Tuesday, June 30, 2020


CROCHETED JAR OPENER


Materials Needed:
Grip Type Shelf liner (any color)


E hook (or hook that will fit into the holes in the shelf liner)
Cardboard circle
Small amount of yarn


Draw a circle on a piece of cardboard or piece of cardstock. Make the circle any size you want. If you don’t have a compass to draw out the circle, you can use a bowl and just trace around it. This will become your pattern for cutting the circle out of shelf liner.


Row 1: Sc around the shelf liner circle. Do not sc in the holes that are close to the edge. Sc in the holes that are at least one space away from the edge. Join with a slip stitch to first sc.


Row 2: *Sc in the next 5 sc, 2 sc in the next sc (increase made)*. The increases will help your jar opener to lie flat. Repeat from * to * around. Join with slip stitch to first sc. End off and weave in the ends.


DONE!

Monday, June 8, 2020


18” CROCHETED DOLL SKIRT


Materials
¼ inch Elastic – 10½”
3 Ply (sport weight or baby yarn) Small amount
G hook


Overlap ends of elastic and secure (machine sewing or hand sewn). Just make sure it is secure and won’t come apart.


Row 1 – sc around elastic (about 60-66 sc). Join. Ch 1


Row 2 – sc in each sc around. Join. Ch 1


Row 3 – sc in each sc around. Join. Ch 2


Note: Ch 2 does not count as first dc.
Row 4 – dc in first sc and in each sc around. Join. Ch 2
Repeat row 4 until desired length (about 9-10 rows for knee length).


Next row – sc in each dc. Join. Ch 1.


Last row – picot stitch (sc, ch 3, ss in 1st ch, sc in next 2 sc). Repeat (picot stitch) around. Join. Fasten off and weave in ends.


DONE!

Wednesday, June 3, 2020


MAKEUP REMOVER PAD


H hook
Scrap yarn (100% cotton yarn)


NOTE: Ch 2 at beginning of rounds does NOT count as first stitch.
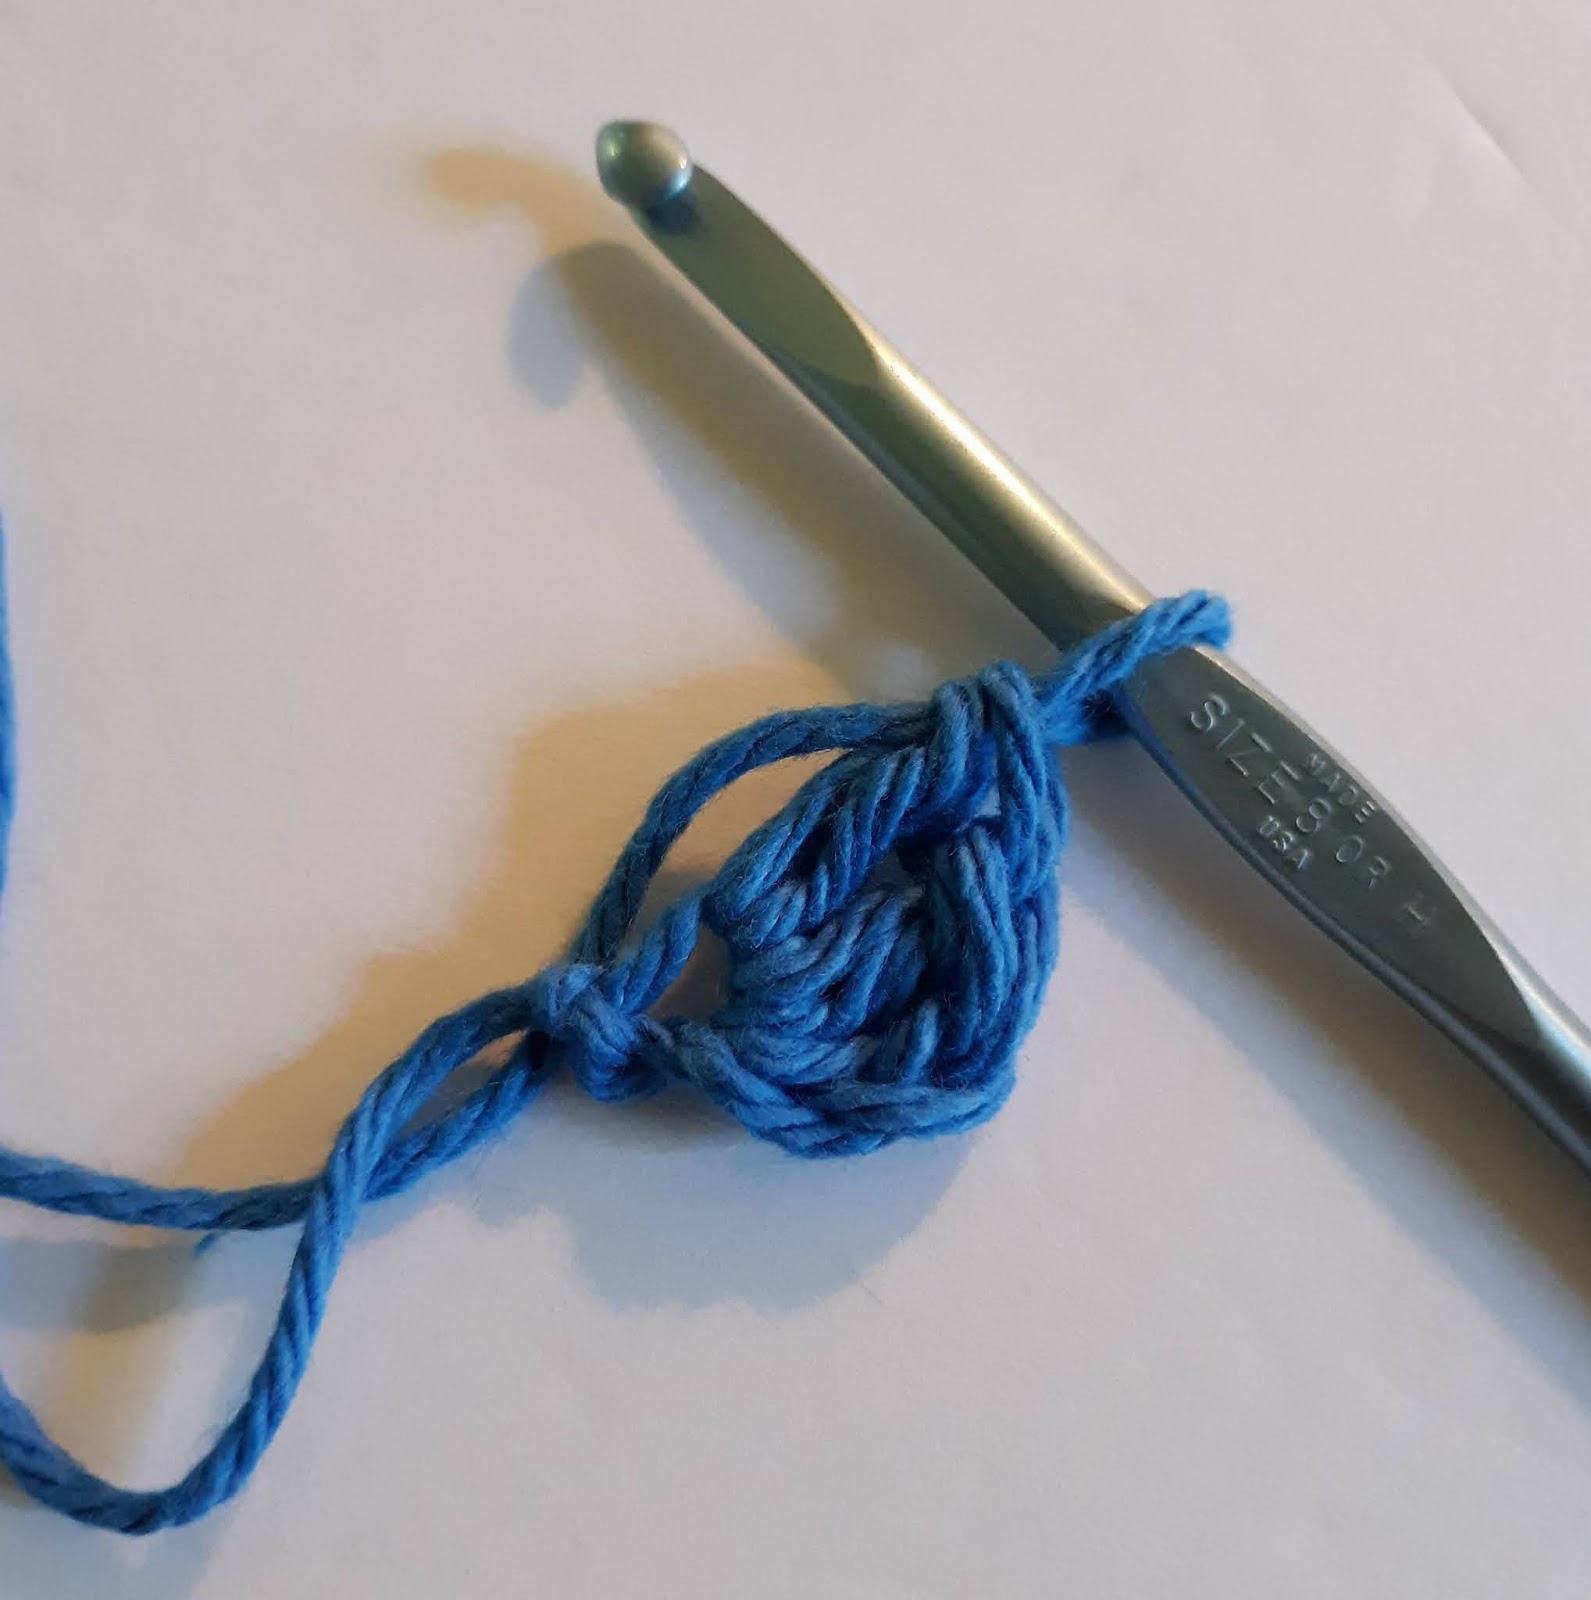

Round 1 – Ch 3

 
12 DC in the 3rd chain from hook. Join to 1st stitch.


Round 2 – Ch 2, 2 DC in same stitch as ch 2. 2 DC in each stitch around (24 DC made)


Round 3 – Ch 2, DC in first stitch, 2 DC in next stitch. *DC in next stitch, 2 DC in next stitch* - repeat from * to * around. Join at first stitch. Fasten off.


Make a 2nd pad using the same instructions as above through Round 3 – DO NOT fasten off at the end of round 3.

Take the “tails” of the first pad and tie together. Cut yarn so that it is shorter than the pad (this will keep the yarn inside of the pad so that it doesn’t poke out.


Next, we will be crocheting the 2 pads together.


Put both sides together (put the wrong sides in so that both sides have the right side facing out). Holding both together, Ch1, then SC through both pads. Join with 1st stitch and fasten off. Weave the yarn tail into the pad (inside).


Sides are pulled out to show that the 2 pieces are crocheted together. The pad will lie flat.


You now have a double thick makeup remover pad! (You could also use it as a coaster)


Would you rather just buy it instead of making them? I have some in my Etsy Shop!